TrackSense User Manual
1 TrackSense User Manual
TrackSense is an online app that automatically collects trip and location data from your vehicle account (Webasto) or via your mobile phone, and organizes it intelligently with AI into a complete, clear digital travel logbook. Your travel behavior also refines your travel profile through a unique travel fingerprint, which is in turn used for personal destination suggestions and overnight stops in the Travel planner, which you use to build a new trip in advance. This way you manage routes, tours, photos and travel reports in one place, including map view and PDF export, while privacy and security remain central so your data stays protected and you can quickly find and share every trip with fellow travelers.
This manual is intended for end users of TrackSense. The app has four main parts, reachable via the top bar:
Travel plannerfor building a new trip: choosing destinations, creating a timeline with stops and viewing overnight suggestionsMy trips(shown as "Mijn reizen" in the screenshots, formerlyKaart) for viewing tours, route points and recognized locations on the mapTravel profile(shown as "Reisprofiel" in the screenshots) for a tour-independent profile viewSettings(shown as "Instellingen" in the screenshots, formerlyBeheer) for account, tours, guest access, locations and route points
The Travel planner link only appears when this feature is available for your account.
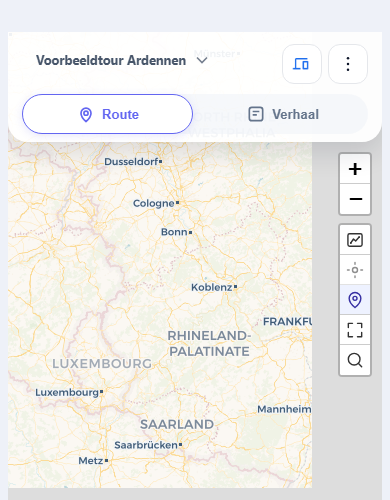
On mobile you can also use TrackSense as a web app. In that mode the app opens directly into a compact mobile flow for live tracking.
⚡ Quick start: planning a trip and inviting guests
Six steps, from an empty profile to a trip that guests can follow live:
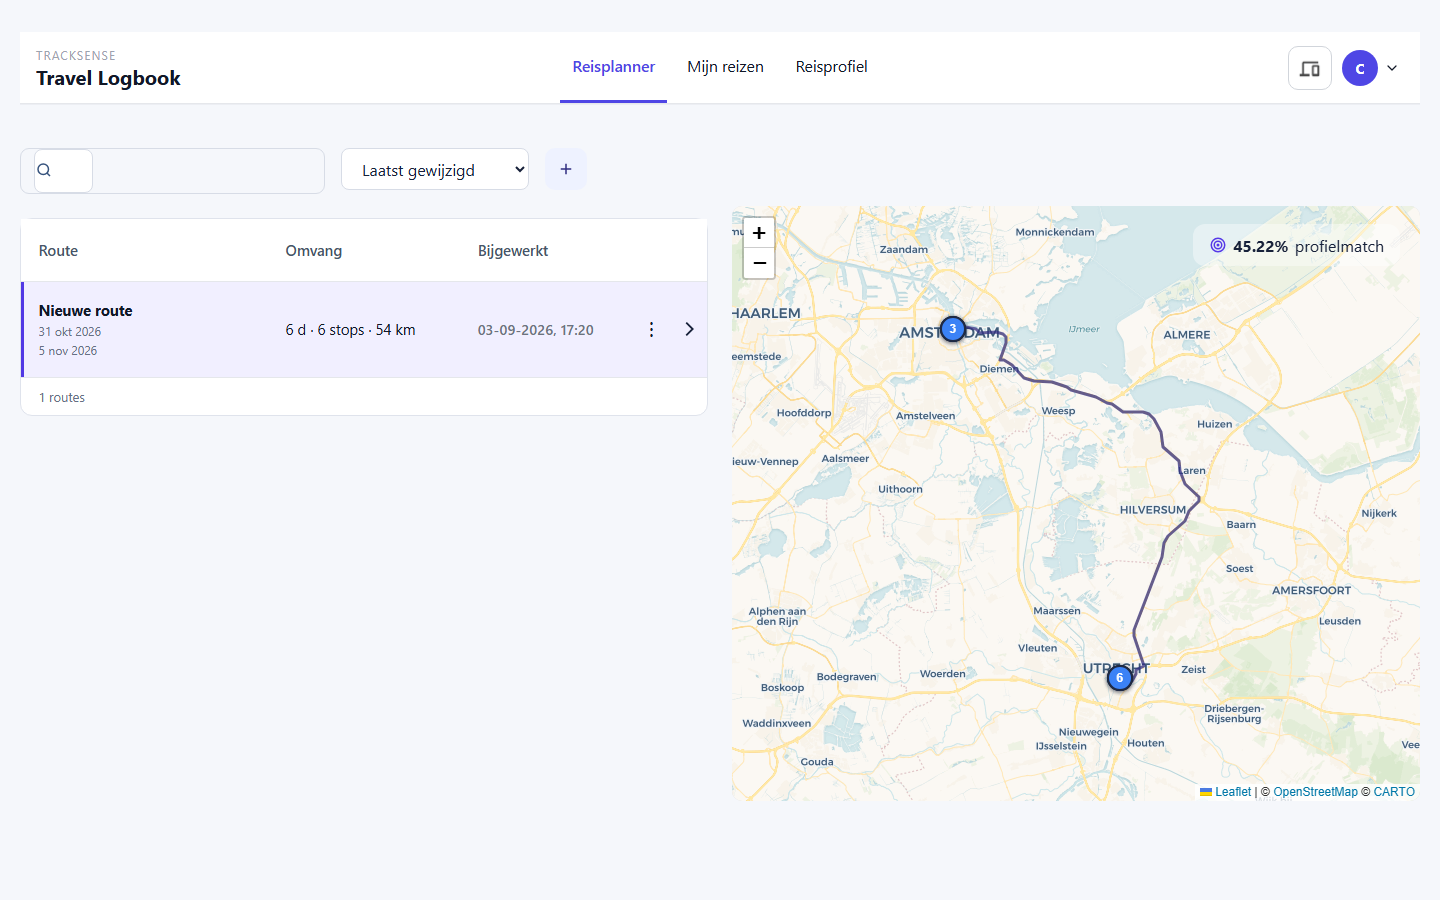
1. Fill in your travel profile (one time)
Destination suggestions and profile-match percentages only really become personal once you have a travel profile. Without this step, TrackSense uses flat default values.
- Open
Travel profilein the top bar. - Click
Make my profile more personal. - Go through the 5 short steps and each time choose the description that fits you best.
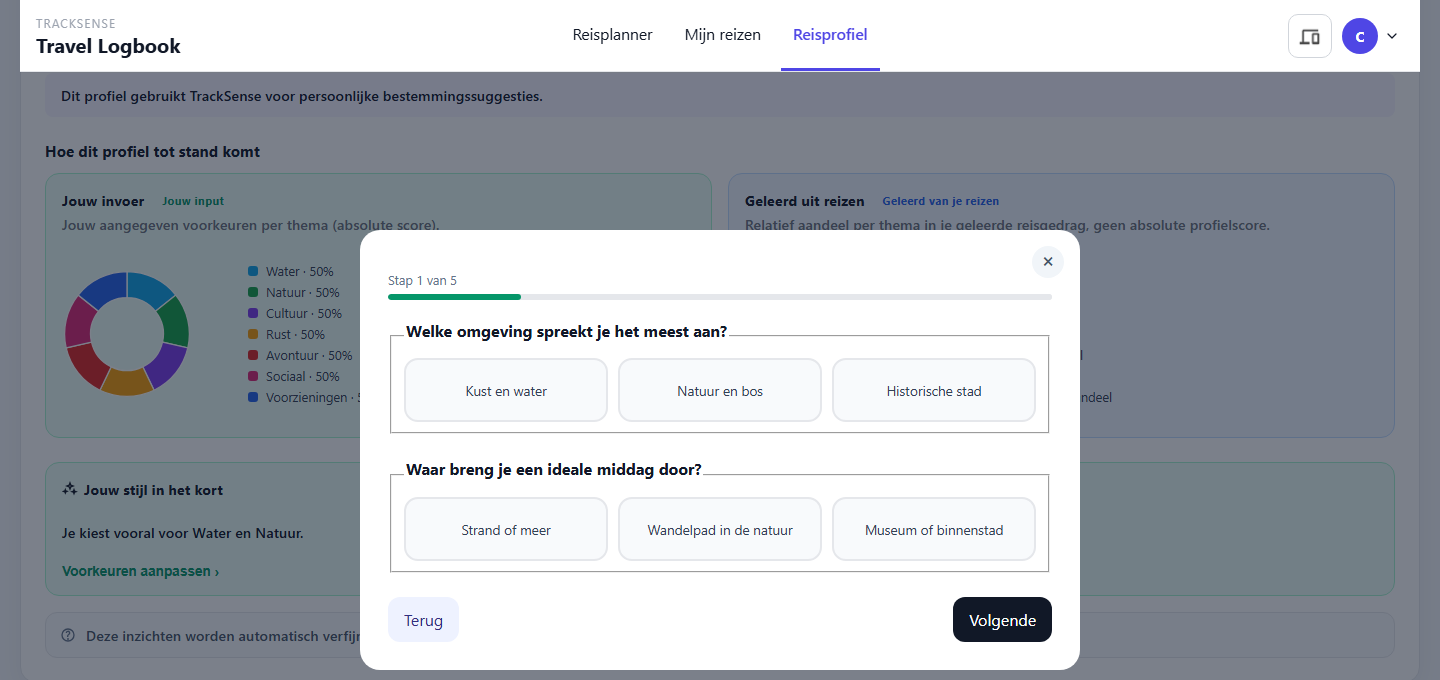
Your travel profile is usable right away, even without previous trips. As you travel more with TrackSense, the profile automatically refines itself based on your recognized stays.
2. Building a new trip
- Open
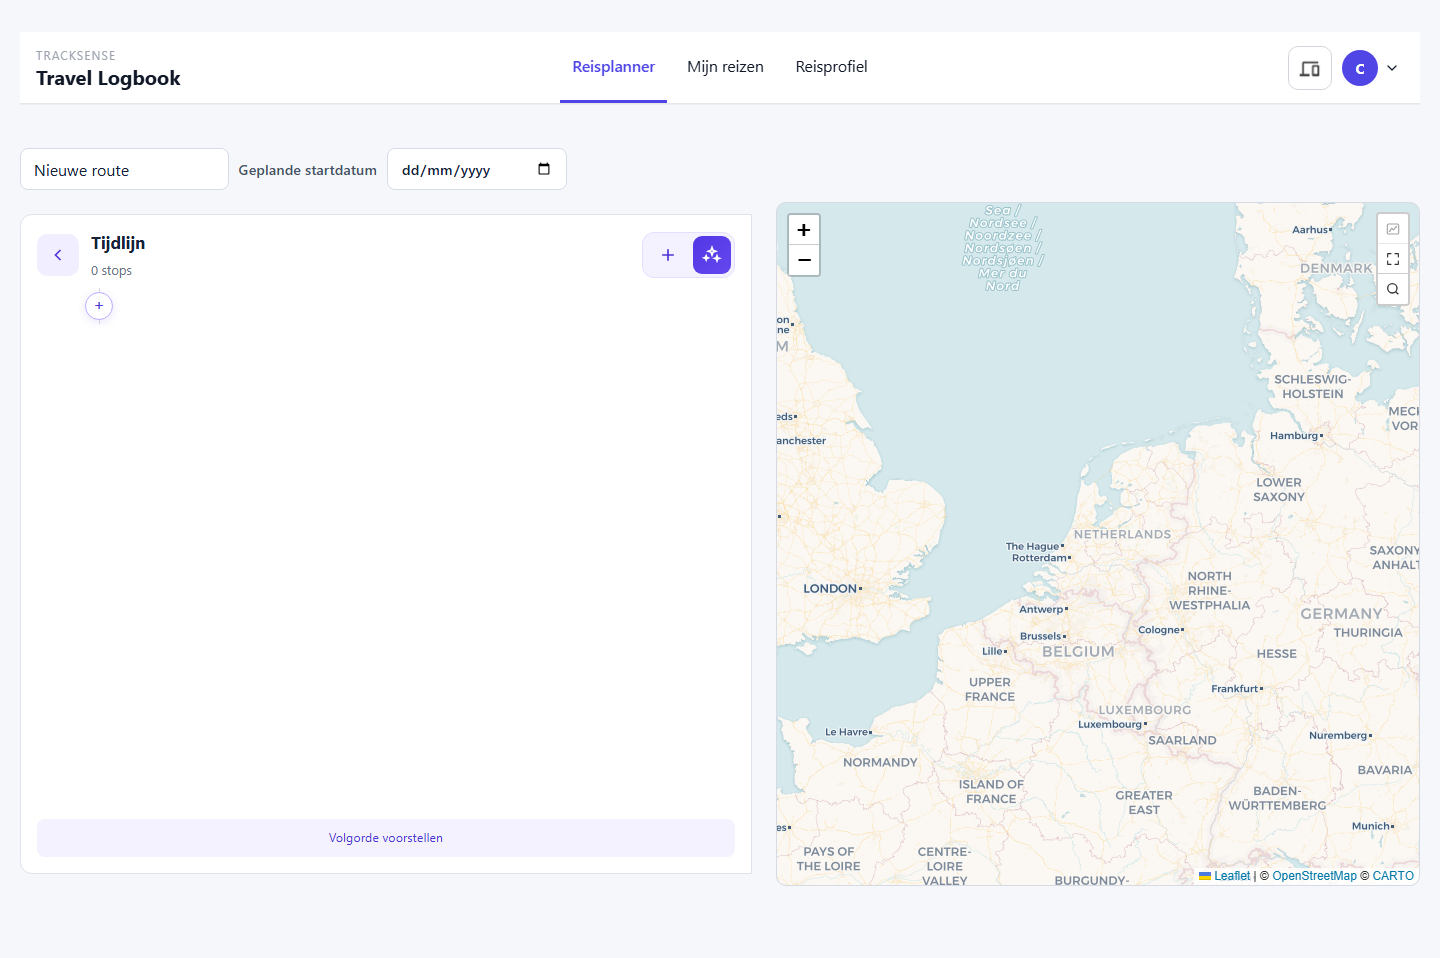
Travel plannerin the top bar. - Click
+next to the sort selector to create a new, empty route. - Optionally fill in a name and a
Planned start date.
3. Planning destinations and overnight stays
- Click a
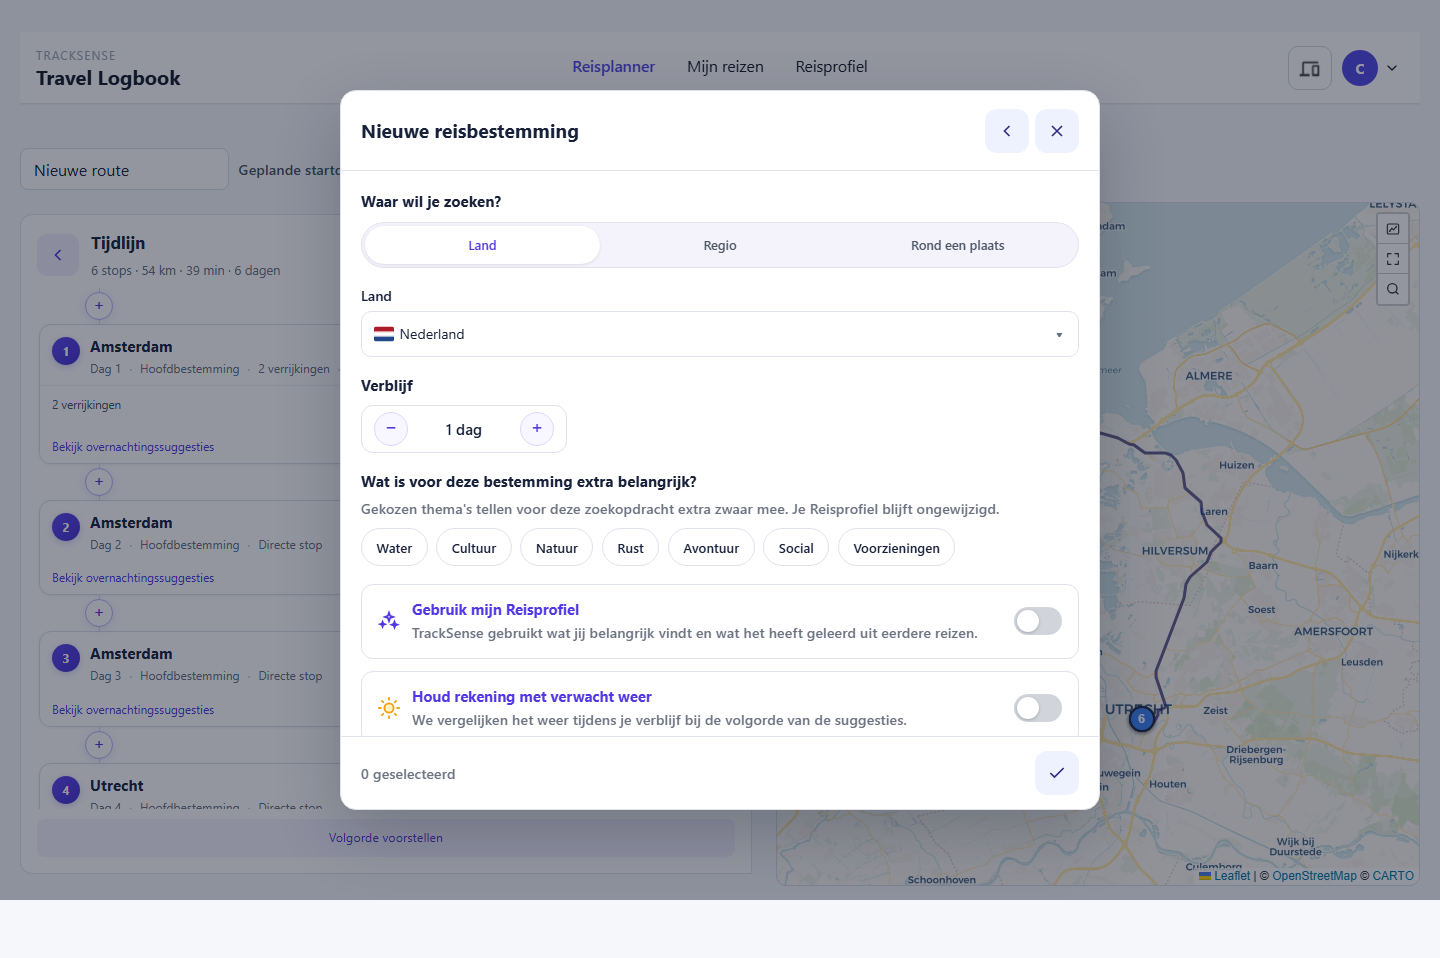
+button in the timeline to add a stop. - Choose
New trip conceptto have destinations suggested by theme (Water, Culture, Nature, Peace and quiet, Adventure, Social, Amenities), optionally weighted with yourTravel profileand the expected weather. - Repeat this for each following stop, or use
Suggest orderto have the route optimized. - Click
View overnight suggestionsat a stop for suitable campsites and motorhome pitches nearby, including profile match and extra travel time.
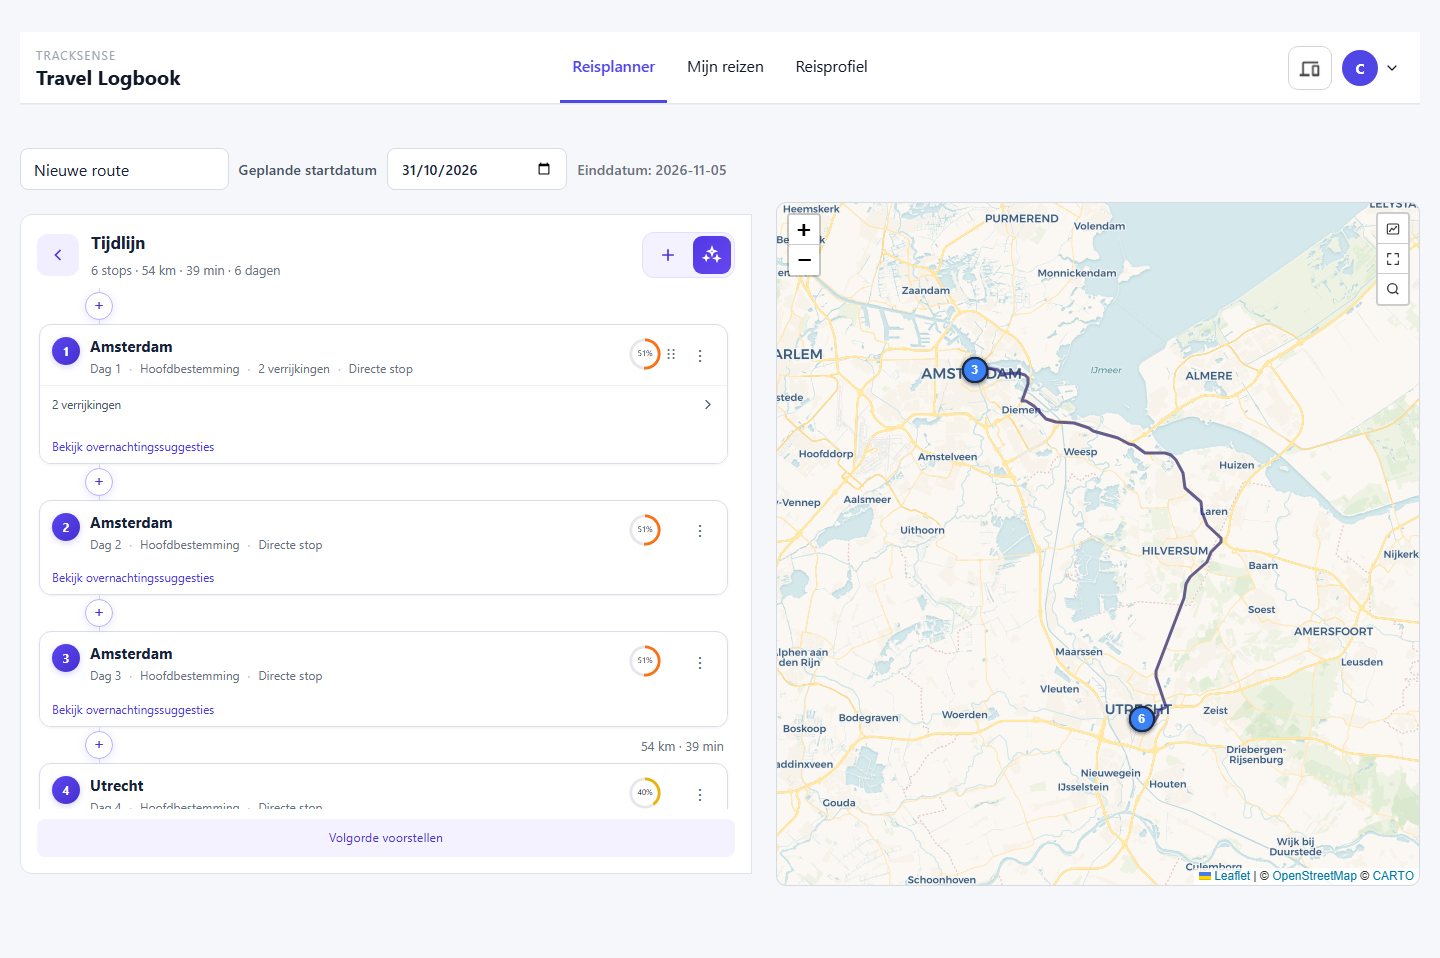
4. Set up your tracking source: Webasto or Mobile
For TrackSense to automatically turn your trips into a tour, it needs to know where your location data comes from. Choose one source mode:
- Open
Settingsin the top bar and go toSynchronization. - Under
Source mode, chooseWebasto(link your vehicle account underProvider account (Webasto)with a username and password, and turn onAccount active) orMobile(track your route with the TrackSense app on your phone; this option is only visible if mobile tracking has been enabled for your account). - Optionally turn on
Automatic syncand choose aFrequency, or clickSync nowto test it right away. - Click
Save.
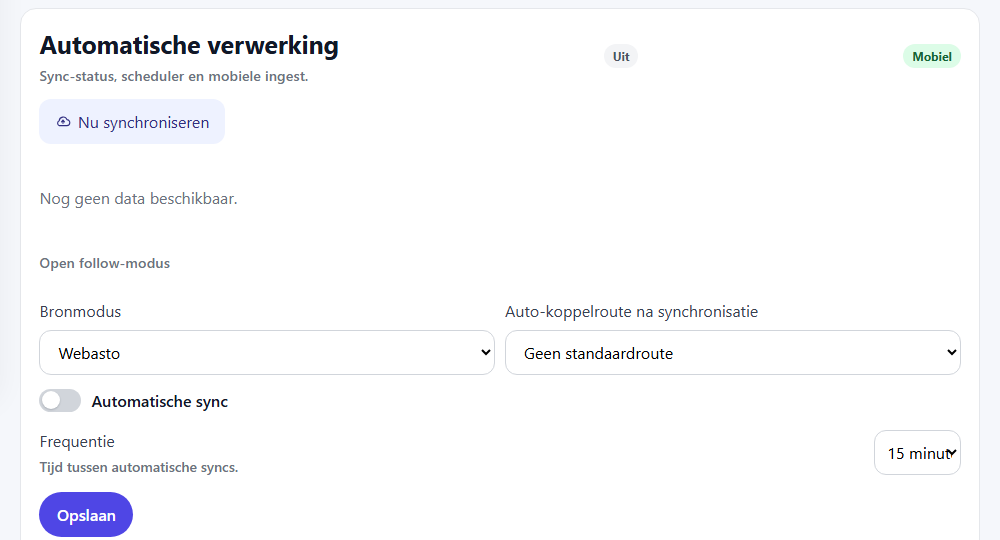
As soon as route and location data start coming in, this is automatically turned into a tour or added to an existing one. See Webasto login settings and Mobile sync wizard for the full details.
5. Getting a tour ready to be followed
A planned route in Travel planner is a concept. To be followed live on the road by guests, the trip needs to be a tour. This happens automatically as soon as your route and location data start coming in via synchronization (step 4), or you create a tour manually:
- Open
Settingsin the top bar. - Go to
Tours. - Click
Create new tour, fill in a name and clickCreate tour.
6. Inviting a guest to follow the route
- In
Settings, go toAccess and guests. - Click
New guestand fill in an email address, a display name and a 6-digit PIN. - In the guest list, click
Managefor the guest you just created. - Under
Tour access, check the tour(s) this guest may follow and clickSave.
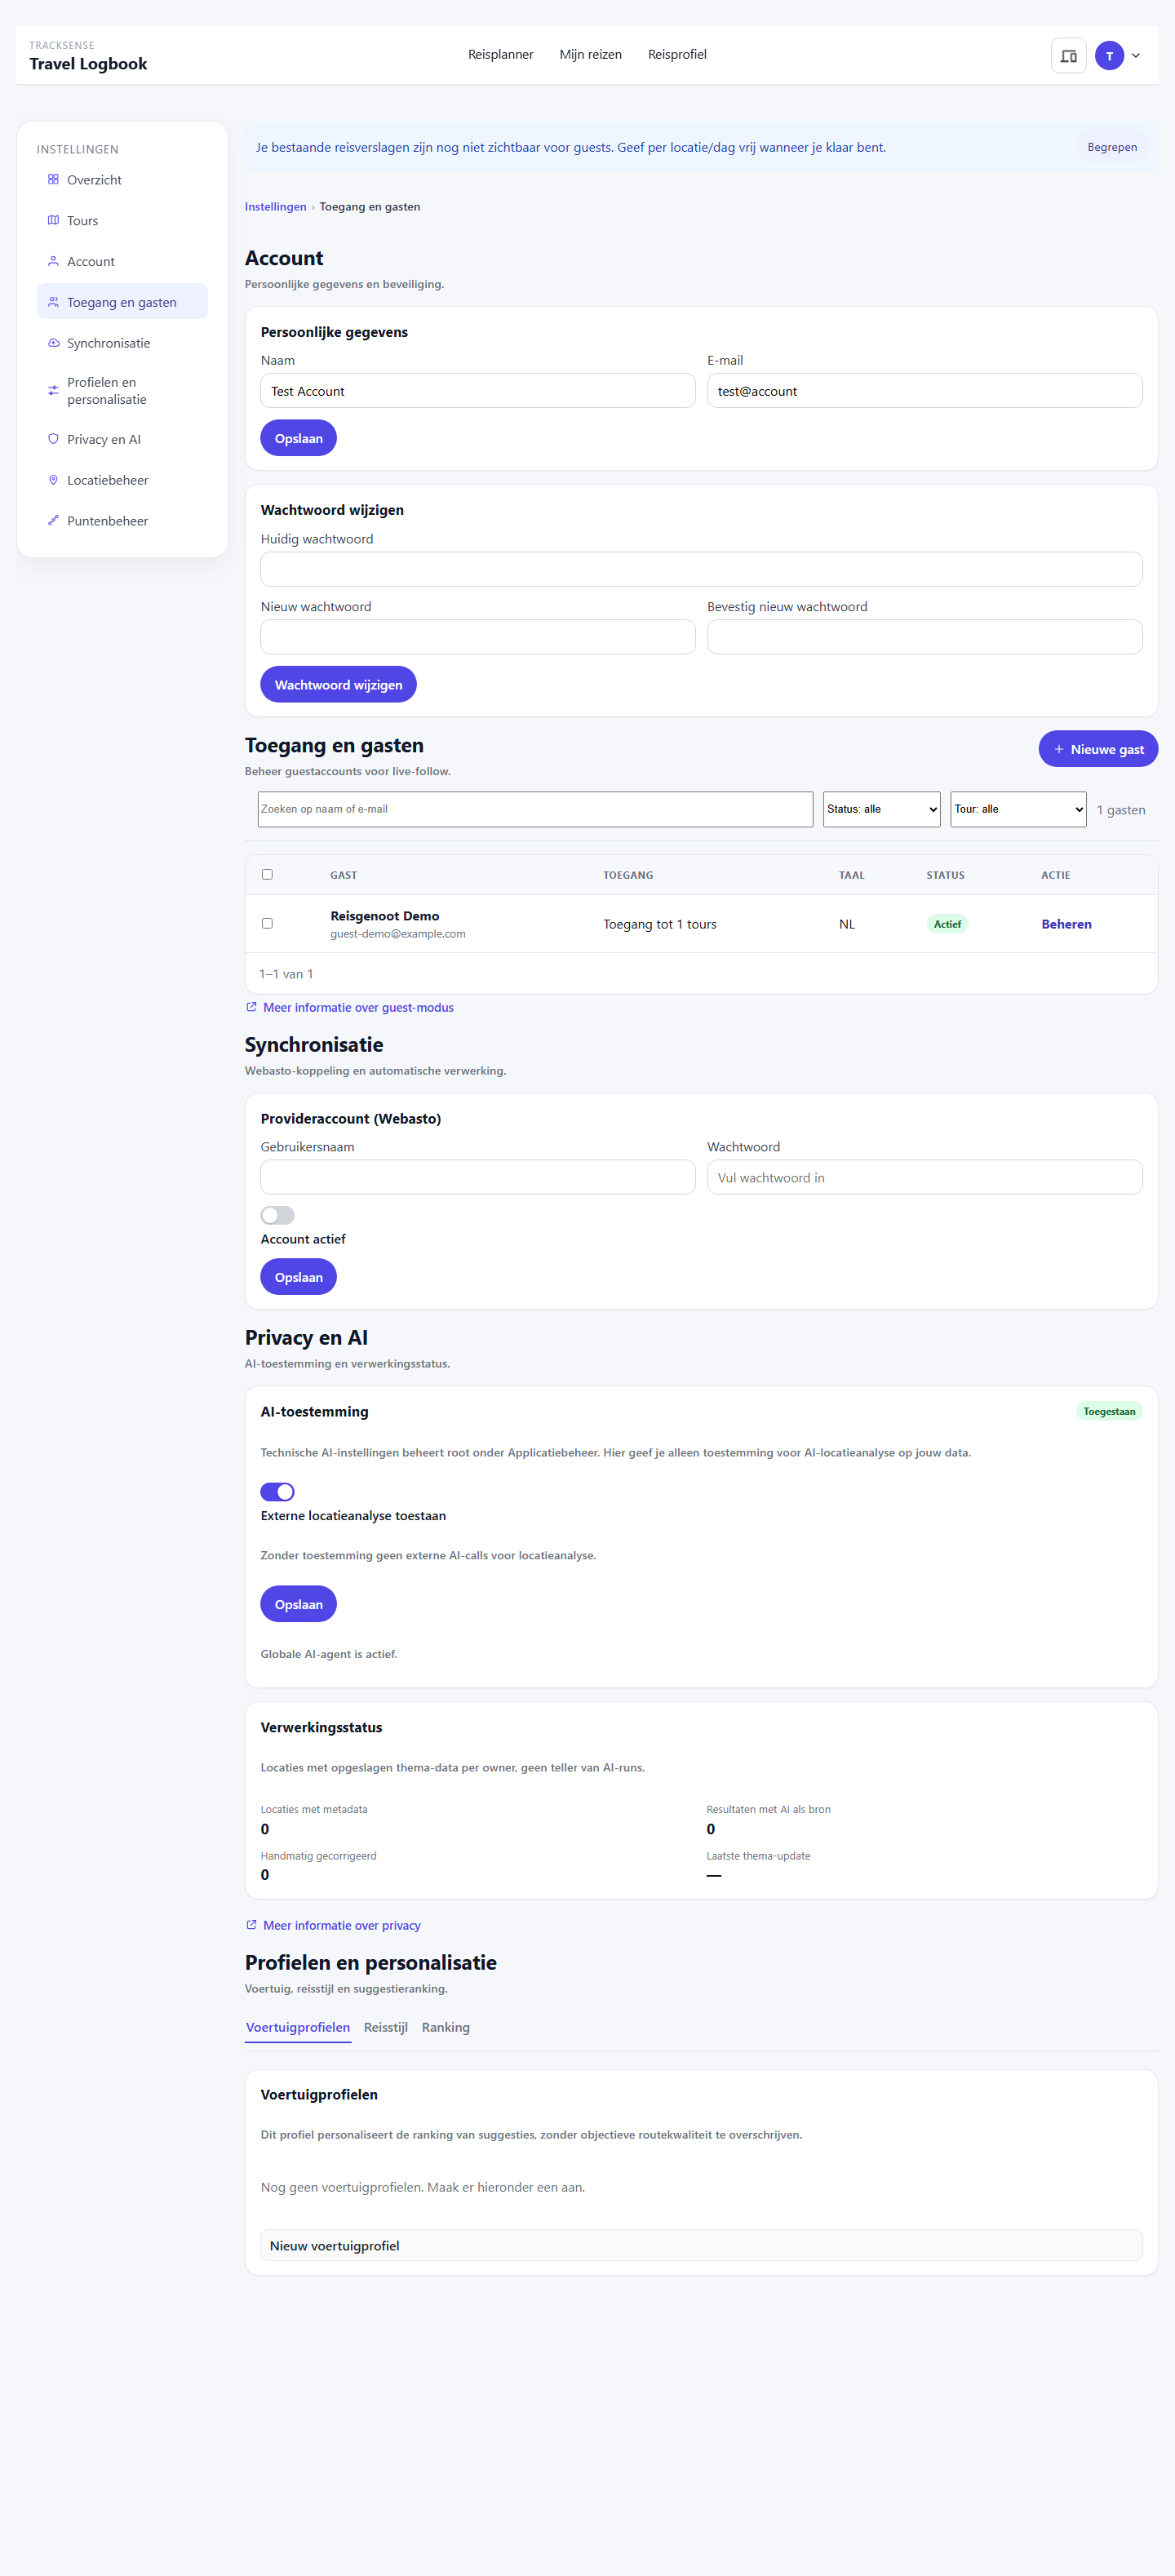
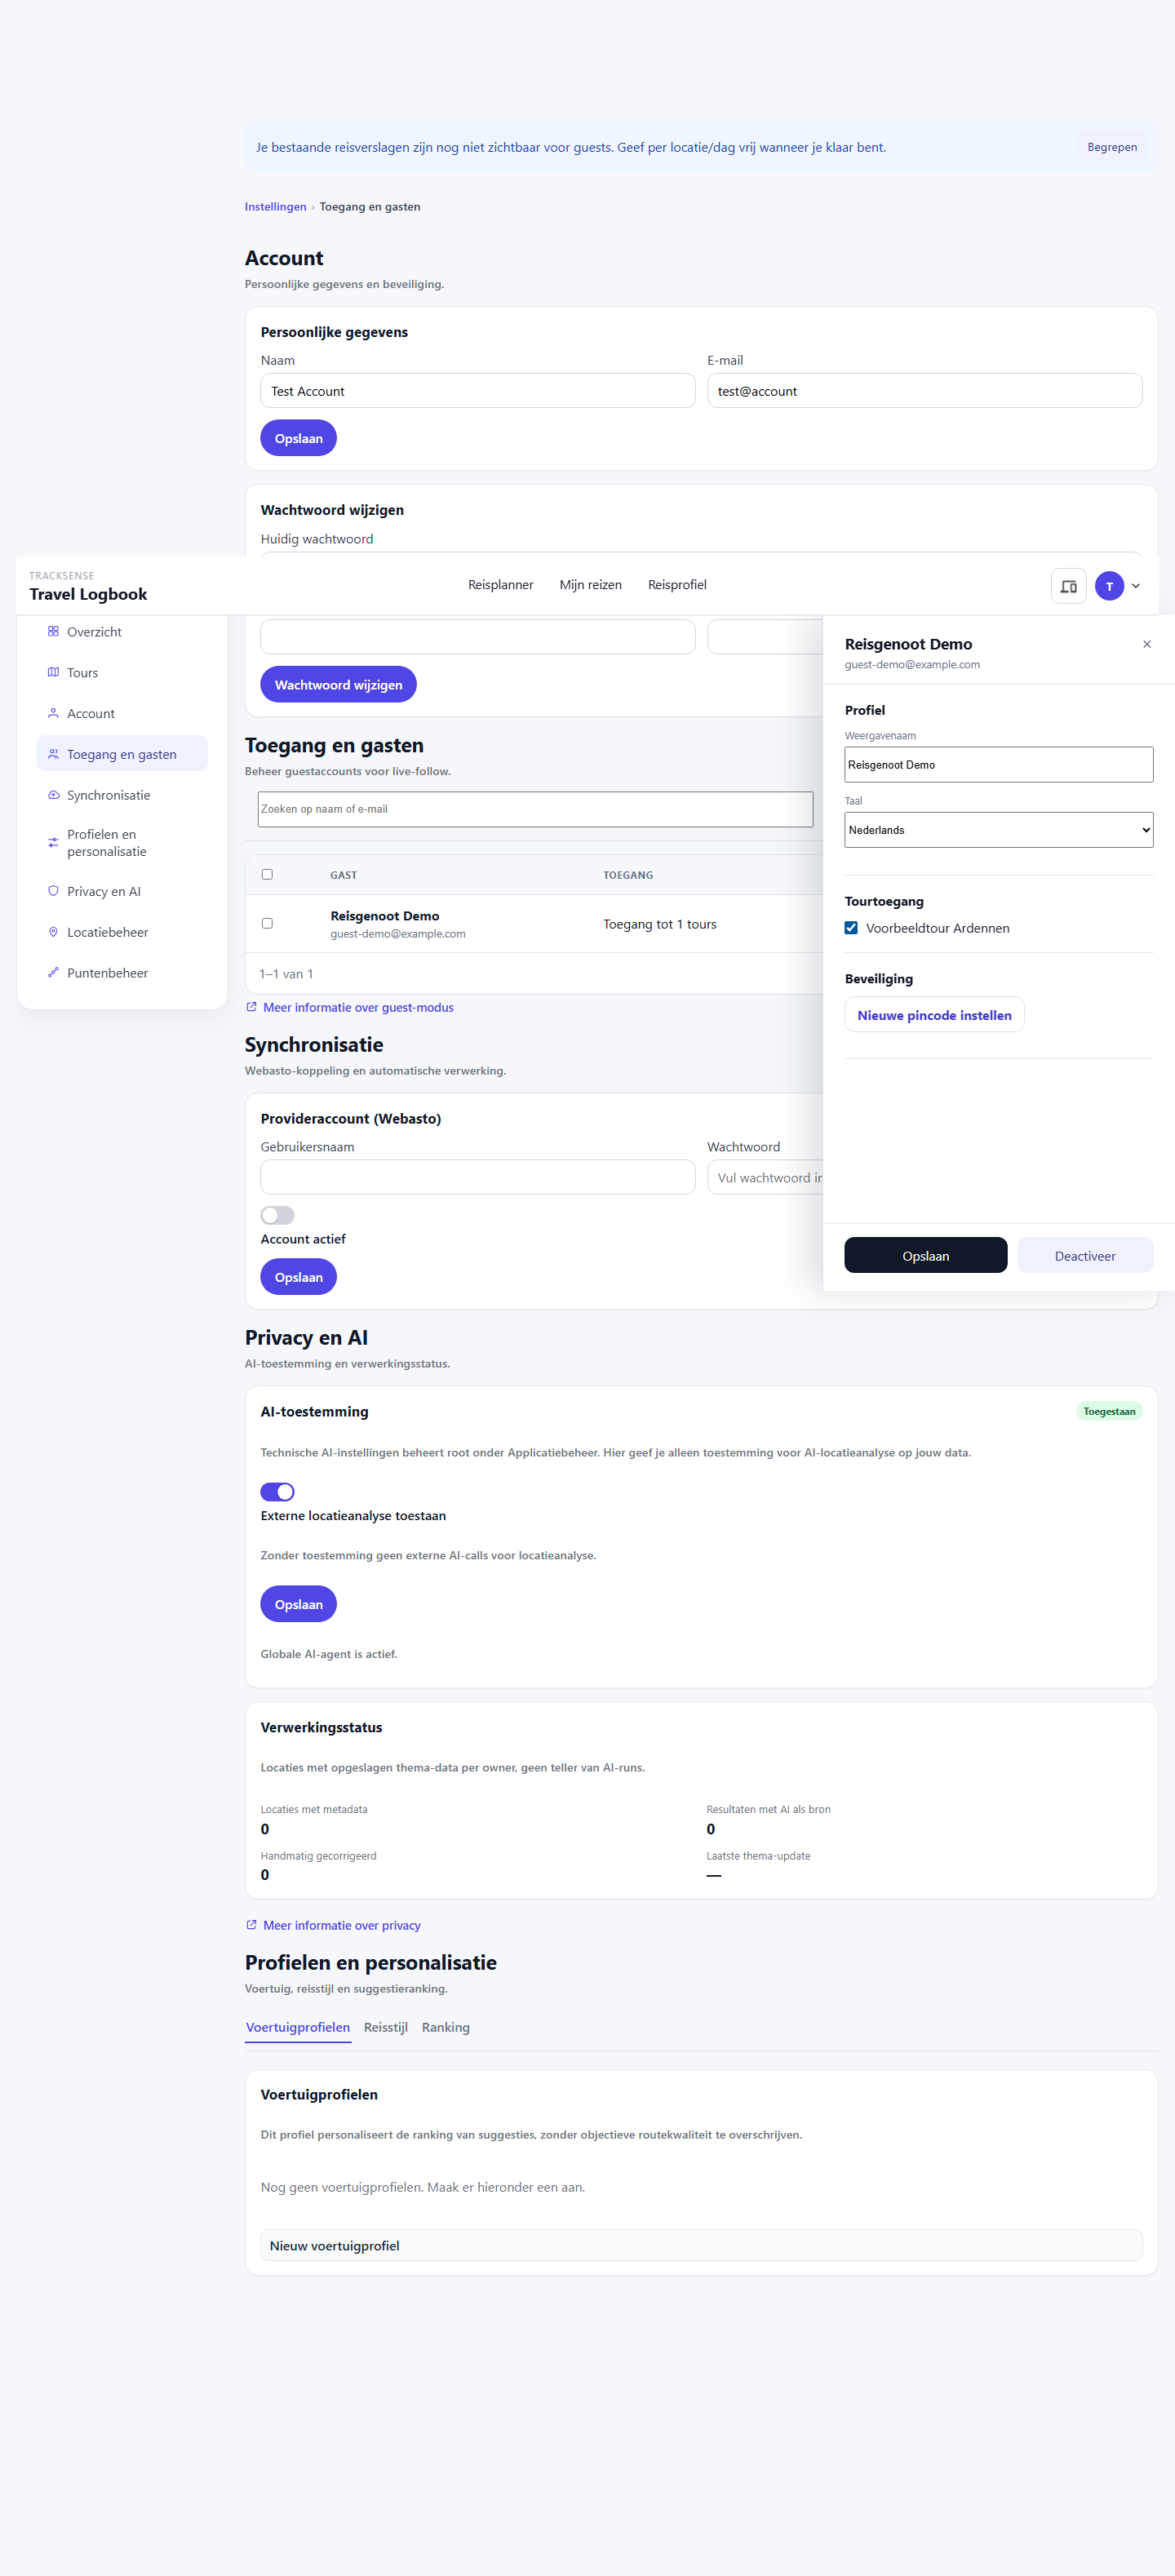
Your guest logs in with the email address and PIN and lands directly in the mobile follow mode, with the route(s) they have been granted access to. See Guest access and mobile follow for the full management of guest accounts, and Core flow: sharing a route for sharing a tour separately with an existing TrackSense user as a viewer.
2 My trips
2.1 Purpose of this screen
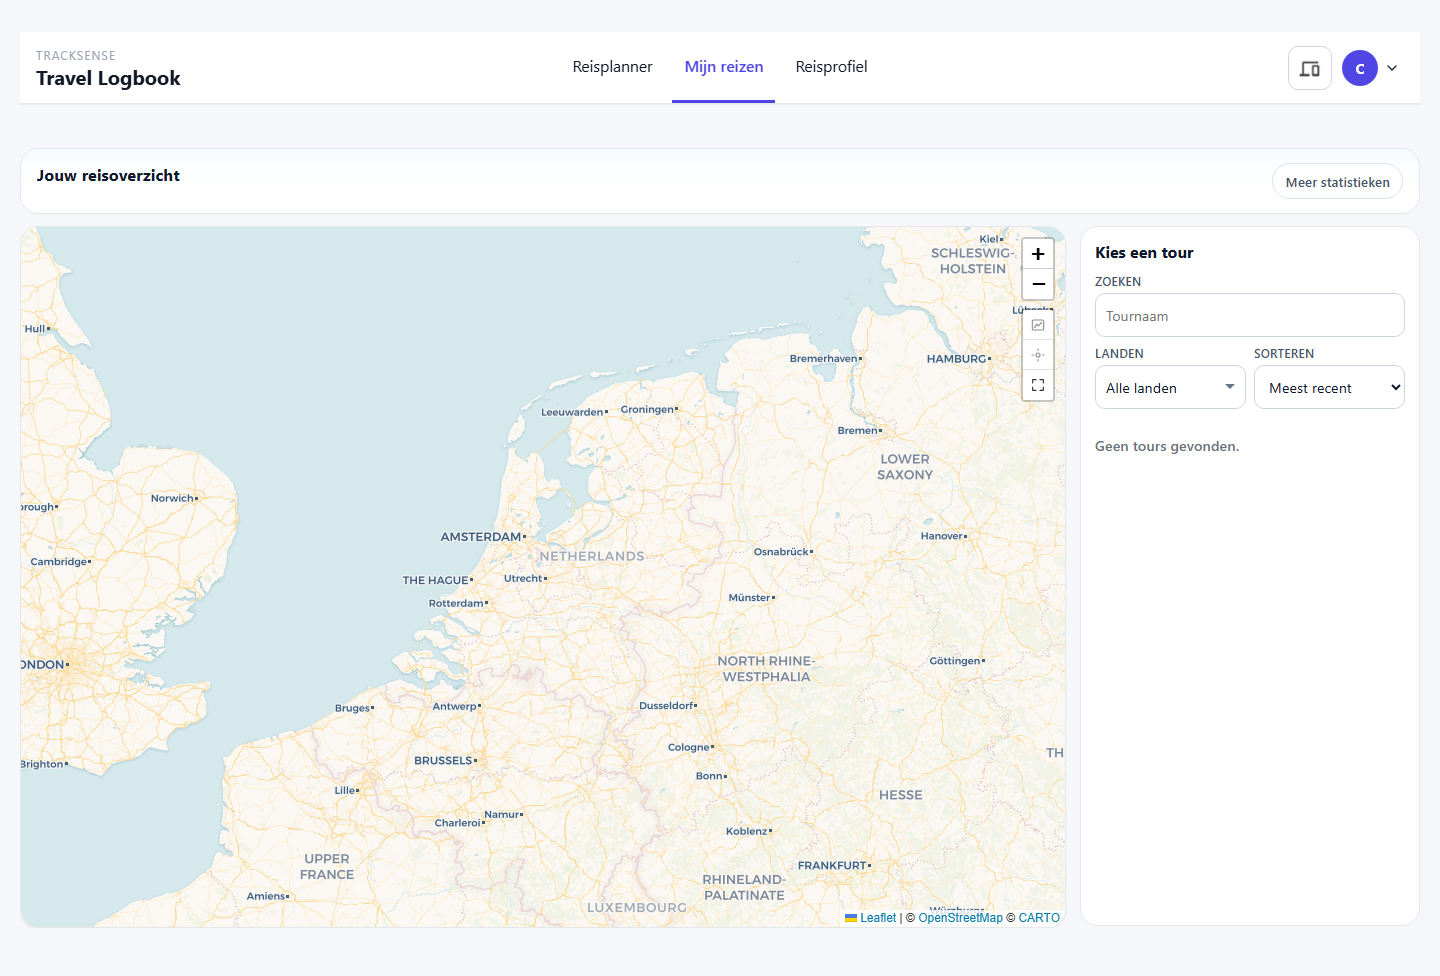
My trips shows your tours, route points and recognized stay locations. This is the screen for everyday use when you want to view or analyze a trip.
2.2 What you see here
Routes, the map itself- a route selector via
Route - a view selector via
All,MineandShared - with a chosen tour, a sidebar with recognized locations
- with a chosen tour, tabs such as
Travel report,Travel profileandRoute quality
2.3 Getting started on the map
2.3.1 All tours
If no specific tour is chosen at Route, the map is set to All tours.
In that case:
- you see route data from all tours within the current view
- recognized locations are not shown as an expanded sidebar per tour
- the PDF export button is not visible
2.3.2 A specific tour
If you choose a tour in the Route list, the map switches to that one tour.
In that case:
- you see the selected route worked out in more detail
- a list with
Recognized locationsappears on the right - the
Export PDFbutton becomes visible - extra tabs for analysis appear below the map
2.4 View: All, Mine, Shared
Above the map you can switch between:
All, shows your own and shared toursMine, shows only your own toursShared, shows only tours that have been shared with you
Use this choice when you want to quickly switch between your own data and other people's data.
2.5 Map filters
2.5.1 Route filter
Via Route you choose which tour is active on the map.
All toursresets the map to the overview- a chosen tour shows the route, recognized locations and extra tabs for that tour
2.5.2 Unassigned points alongside a tour
If you have chosen a tour and there are own route points that are not yet linked to a tour, an extra option may appear:
Show selected route together with ... unassigned point(s)
Use this option when you want to compare loose points with an existing tour.
2.5.3 Relationship with date and point filters
The map takes into account filters that are also used in settings, such as:
- period of route points
- sort order
- whether or not to show only unassigned points
Because of this, it can look as if the map shows fewer points than expected. In that case, first check your active filters in Settings, especially in Point management.
2.6 Understanding map content
2.6.1 Route points
Route points together form the route on the map. They belong to a tour, or are not yet assigned.
In various places you see information such as:
- title of the point
- time
- place name or municipality
- source or type of point
2.6.2 Recognized locations
With a chosen tour, the Recognized locations list appears on the right.
Per location you see, among other things:
- the name or title of the location
- the type of location, for example
overnight stay,visit addressorparking storage - the day number within the tour
- the length of stay
- the distance to the previous location
Use this list to read a trip chronologically.
2.6.3 Meaning of day number, duration and distance
Day numbershows which travel days a location falls onStayshows how long you stayed thereDistanceshows the distance from the previous recognized location
2.7 Tabs for a selected tour
With a chosen tour, extra tabs may appear below the map.
2.7.1 Travel report
Travel report shows the chronological summary of the tour. Here you read the recognized locations in order.
2.7.2 Travel profile
Travel profile only appears when this feature is available for your account and the tour is allowed to be used for it.
Here you see a summary of travel behavior and preferences based on the tour data.
2.7.3 Route quality
Route quality only appears for your own tours, not for shared tours.
Use this tab to assess the quality and completeness of a route.
2.8 Practical user flows
2.8.1 Choosing and viewing a tour
- Open
My trips. - Choose a tour in
Route. - View the map, the recognized locations and the tabs below the map.
2.8.2 Switching between your own and shared data
- Open
My trips. - Click
Mine,SharedorAll. - Then optionally choose a tour from the route selector.
2.8.3 Interpreting recognized locations
- Choose a tour.
- View the
Recognized locationslist. - Read the type, day number, duration and distance per location.
- Click or focus on locations in the sidebar to follow the tour better on the map.
2.8.4 Exporting a route as PDF
- Choose a tour on the map.
- Click
Export PDF. - Use the exported document as an overview of the route, including map, period, distance, recognized locations, photos and video references.
Videos are shown in the PDF as recognizable video cards. The video itself remains available in TrackSense.
2.9 Common messages and things to watch for
2.9.1 Empty map
Possible causes:
- there are no route points yet
- your filters are too strict
- the chosen view is set to
SharedorMinewhile there are no matching tours in it
2.9.2 No recognized locations
The message No recognized locations for this tour yet. usually means:
- the tour does not yet have suitable stops for recognition
- recognition has not yet been recalculated
- the tour still contains too little route data
2.9.3 Filter returns no results
Then check:
- whether the correct tour is chosen
- whether the period is set correctly
- whether
Only unassigned route pointsis active in another flow
3 Travel profile
3.1 Purpose of this screen
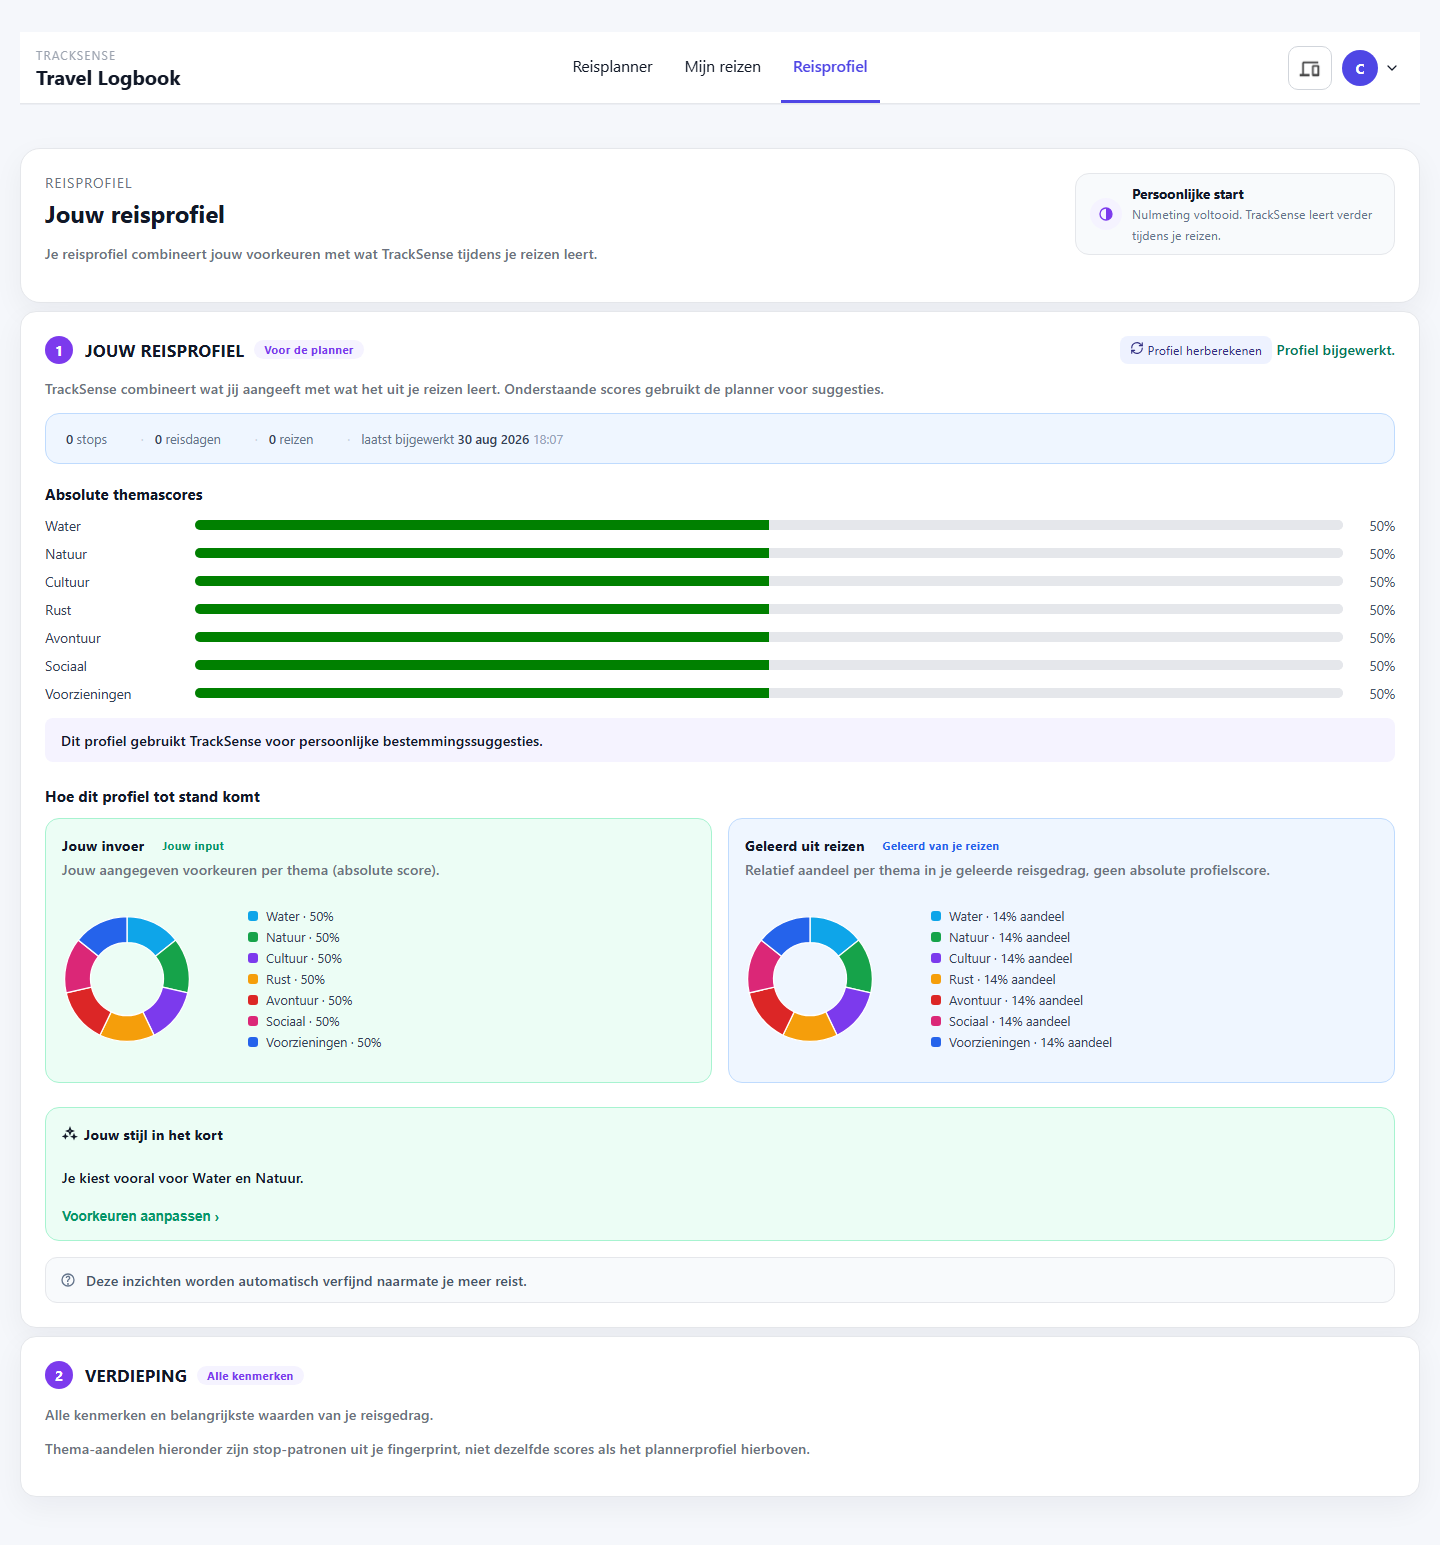
Travel profile is a separate page next to the map. This page shows your profile insight without a map, without route quality and without a tour selector.
3.2 What you see here
- a compact page header with
Travel profile - one central profile card
- profile summary, coverage, theme sliders and characteristics
- the
Recalculate profilebutton
3.3 Important rules
- the page always uses
context_key=default - there is no context selector on this page
- only tours with
include_in_travel_fingerprint = truecount - the page is intended for regular owner accounts
3.4 Access
- an owner with write permissions sees the full profile view
- root and other users without permission see a clean message without a profile component
- users who are not logged in are redirected to login
3.5 Practical user flow
- Open
Travel profilevia the top bar. - Check the summary and theme sliders.
- Click
Recalculate profileif you want to fetch the most recent calculation.
4 Settings
4.1 Purpose of this screen
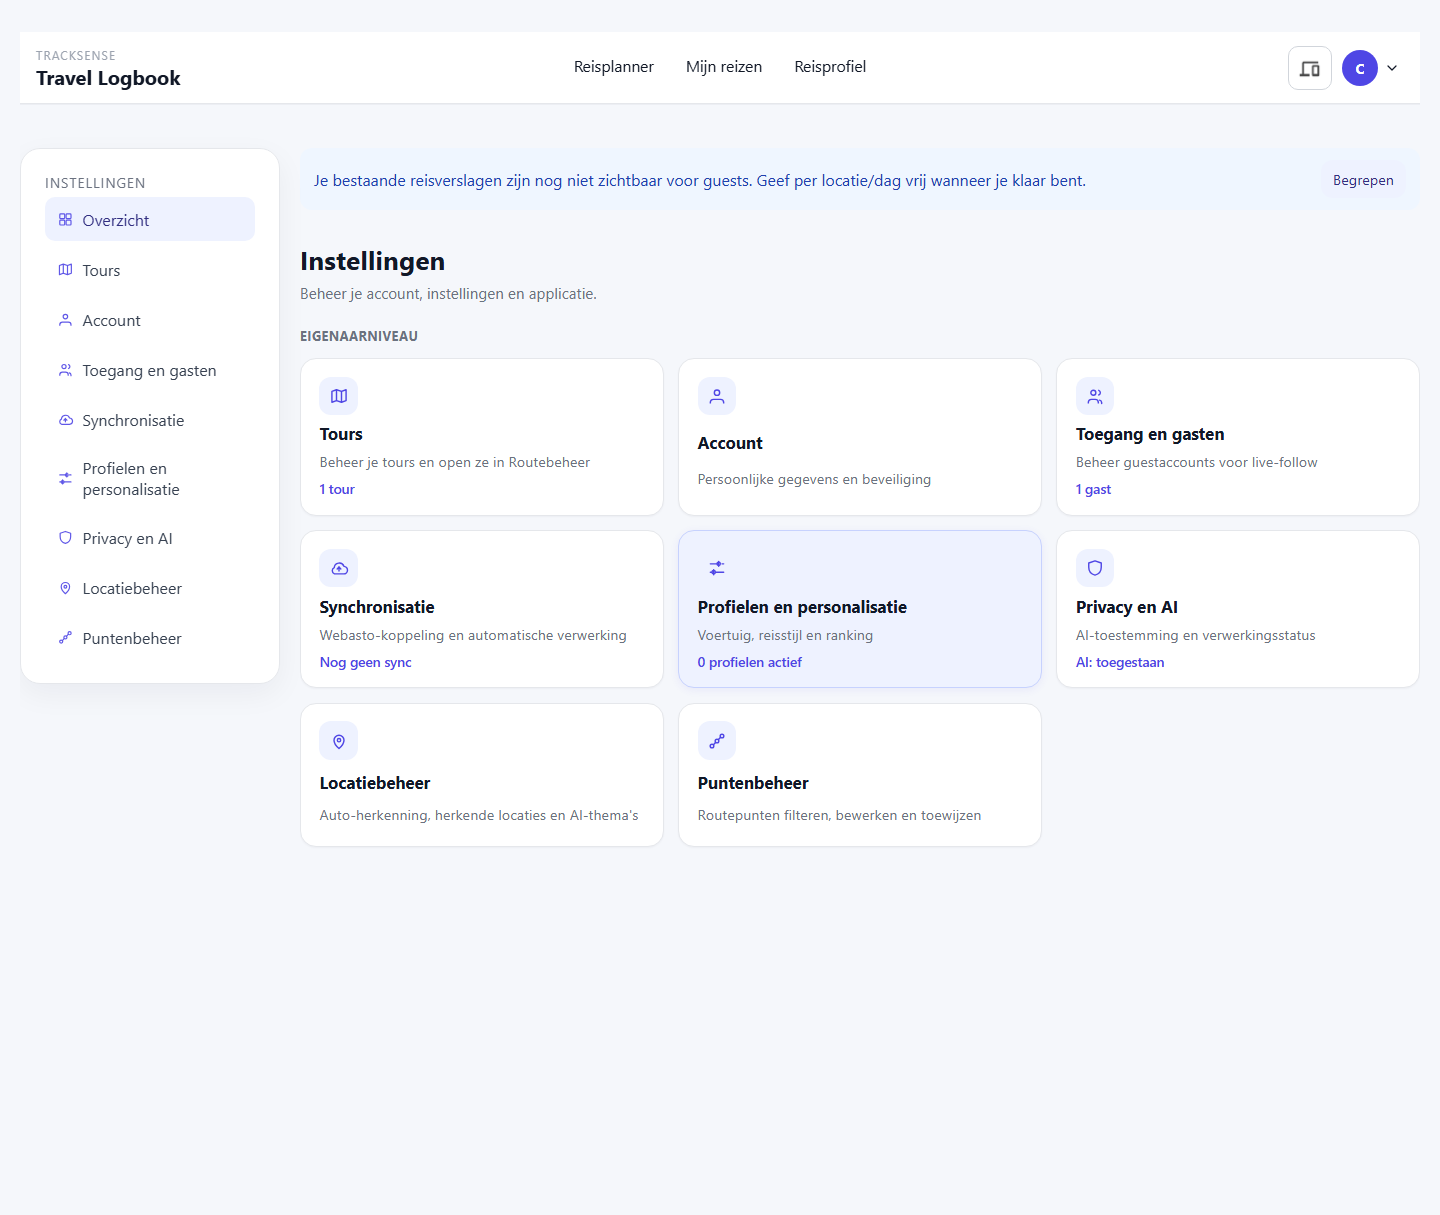
Settings is intended for configuring and maintaining your own data. Here you manage account, tours, guest access, synchronization, profiles, recognized locations and route points.
4.3 Overview and synchronization
4.3.1 Purpose of this screen
Overview is the home page of Settings: a dashboard with a card per section (Tours, Account, Access and guests, Synchronization, Profiles and personalization, Privacy and AI, Location management, Point management), each with a short status line. Synchronization is the starting point for linking your Webasto provider account and starting a sync.
4.3.2 Main actions
- starting a manual sync via
Synchronization - viewing status messages
- checking whether data has been reprocessed
- opening the
Mobile sync wizard
4.3.3 Mobile sync wizard
Via the Open mobile sync wizard link you go to a separate screen for mobile use.
There you can:
- choose the sync source,
WebastoorMobile - activate a route for sync, in
Webastomode - open
follow modedirectly for live tracking
Important:
- in mobile standalone mode, TrackSense automatically opens
follow mode follow modeis intended for on the road, with map and travel diary in one screen
Installing as an app on mobile:
- Android (Chrome):
- Open TrackSense in Chrome.
- Open the browser menu in the top right.
- Choose
Add to home screenorInstall app. - Confirm with
Install.
- iOS (Safari):
- Open TrackSense in Safari.
- Tap
Share(square with an arrow pointing up). - Choose
Add to Home Screen. - Confirm with
Add.
4.3.4 Core flow: starting a sync
- Open
Settings. - Go to
Synchronization. - Start the synchronization.
- Wait for the message above or in the screen.
4.3.5 What messages usually mean
- a success message means the synchronization has been carried out or scheduled
- an error message usually means an account setting is missing or the source was unreachable
4.3.6 Note
If you don't see new data in My trips or in Settings, first check:
- whether your Webasto account is active
- whether the sync completed without an error message
4.4 Account
4.4.1 Purpose of this screen
Account (formerly part of Accountbeheer) contains your personal details and password. Synchronization settings are located separately under Synchronization, and profile settings under Profiles and personalization.
4.5 Personal
Under Account you manage:
- name
- login email
- password
Use this section when you want to change your account details.
4.6 Guest access and mobile follow
In the app this screen is called Access and guests (Settings → Access and guests). Here you create guest users for mobile-only follow mode, and link them to the tour(s) they are allowed to follow.
Main input fields at New guest:
EmailDisplay name, optionalInitial PIN (6 digits)Language
Main actions in the guest list and the management panel (Manage):
- creating a
New guest Set new PINDeactivate- under
Tour access: check which tour(s) this guest has access to
Important behavior:
- a guest account is linked to your owner account
- a guest account only has access to the mobile follow flow, and only to the tours that are checked under
Tour access - a guest logs in with an email address and PIN, and lands directly in
follow mode - without tour access, or without an active tour at the owner, the guest cannot start in follow mode
- additionally, enable
Enable guest modein the tour settings of the relevant tour (seeCore flow: sharing a route) to determine exactly what a guest may see, such as live location, comments and likes
4.7 Webasto login settings
This section is located in the app under Settings → Synchronization → Provider account (Webasto). Here you configure the source account for synchronization.
Main fields:
Webasto usernameWebasto passwordAccount active for automatic and manual sync
Core flow:
- Fill in username and password.
- Set the account to active if you want to use sync.
- Click
Save.
If the account is not active, automatic and manual syncs are not used.
4.9 Vehicle profiles
This section is located in the app under the Vehicle profiles tab within Settings → Profiles and personalization. Here you add vehicle profiles and manage existing profiles.
Use this section when you want to save settings for multiple vehicles.
4.10 Travel style profiles and travel profile settings
This section is located in the app under the Travel style and Ranking tabs within Settings → Profiles and personalization. Here you manage preferences related to the travel profile and suggestions.
Use this section if you want to influence how the app summarizes your travel behavior or uses it for suggestions.
4.11 Tours
4.11.1 Purpose of this screen
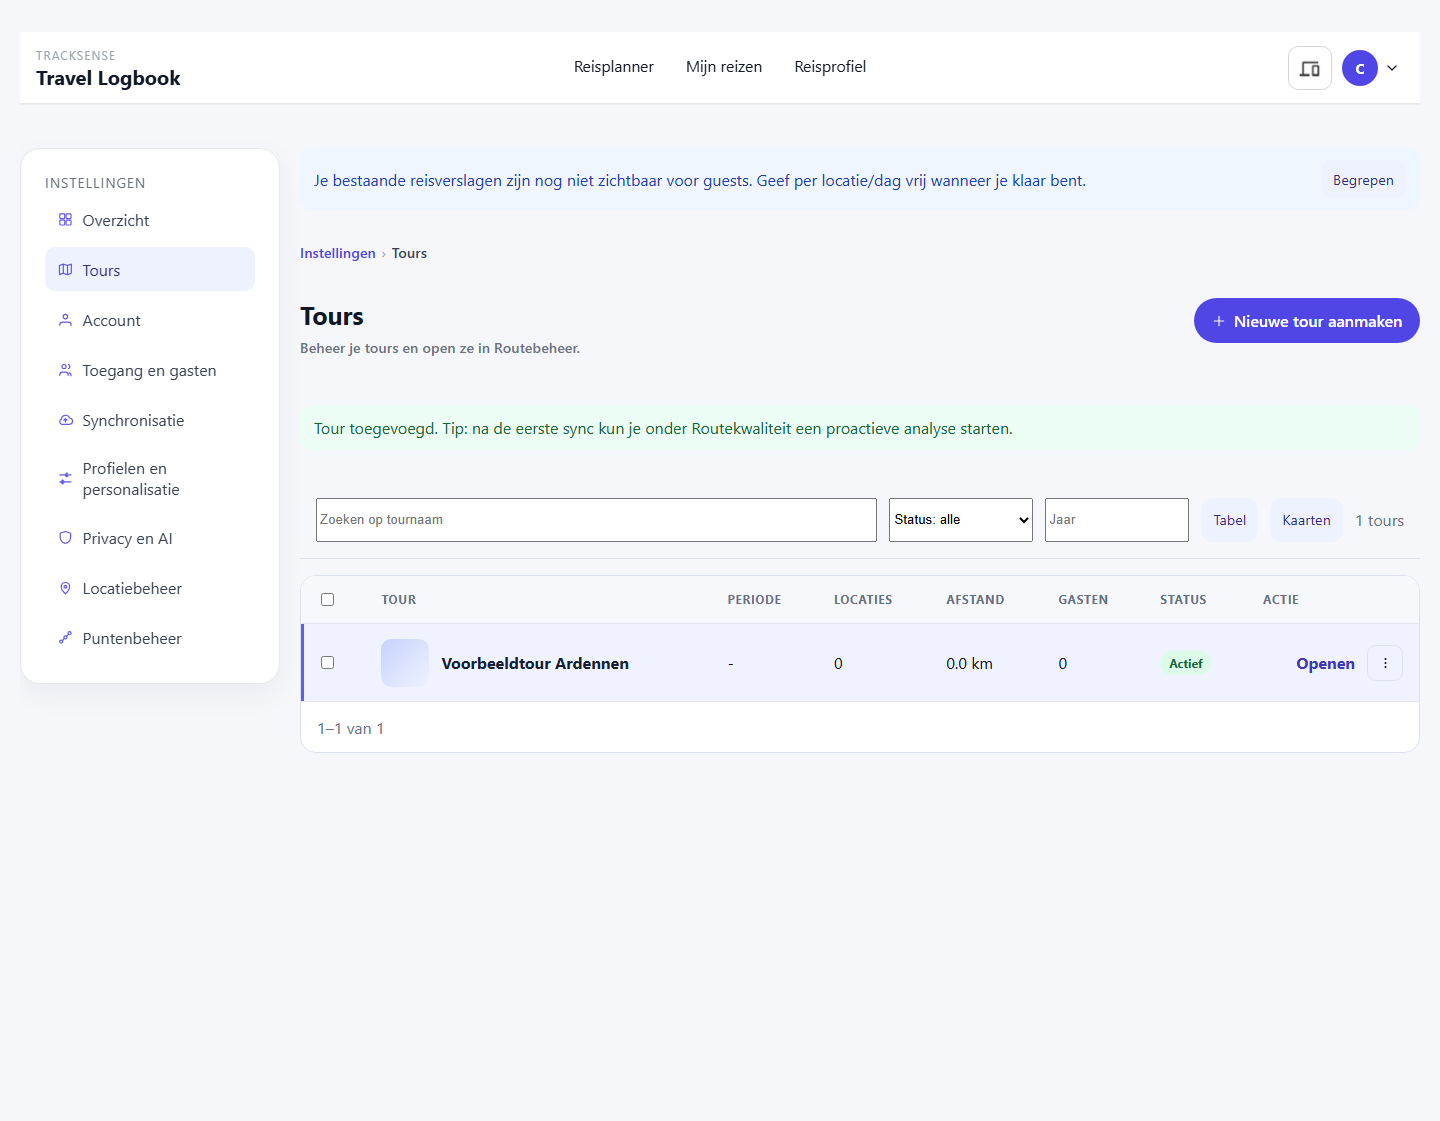
Tours (formerly Tourbeheer), reachable via Settings → Tours, is used for creating, editing, sharing, importing and deleting tours.
4.11.2 What you can do here
- create a new tour
- rename an existing tour
- choose whether a tour should count towards the travel profile
- share a tour with another user as a viewer
- export a tour as GPX
- import a GPX file into a tour
- delete a tour
4.11.3 Core flow: creating a new tour
- Open
Settings. - Go to
Tours. - Click
Create new tour. - Fill in a
Tour nameand optionally add aDescription. - Leave
Include this tour in the travel profile (routes and stops when recalculating)switched on if the tour should count. - Click
Create tour.
4.11.4 Core flow: editing an existing tour
- Find the tour in the list.
- Adjust the name or settings.
- Click
Save.
4.11.5 Core flow: sharing a route
Sharing a tour can be done in two ways, both of which you find via Settings → Tours → ⋮ → Settings for the relevant tour (or via My trips → choose tour → Settings):
- Sharing with an existing TrackSense user as a viewer, under
Sharing and access: choose a user from the list, clickSaveand check the list of existing shares. This person sees the tour as a viewer when they log in with their own account. - Live tracking by a guest, under
Guest / live-follow mode: turn onEnable guest modeand set what a guest may see (live location, comments, likes, ratings, distances/times, owner name). Then link the guest to this tour viaSettings → Access and guests, seeGuest access and mobile follow.
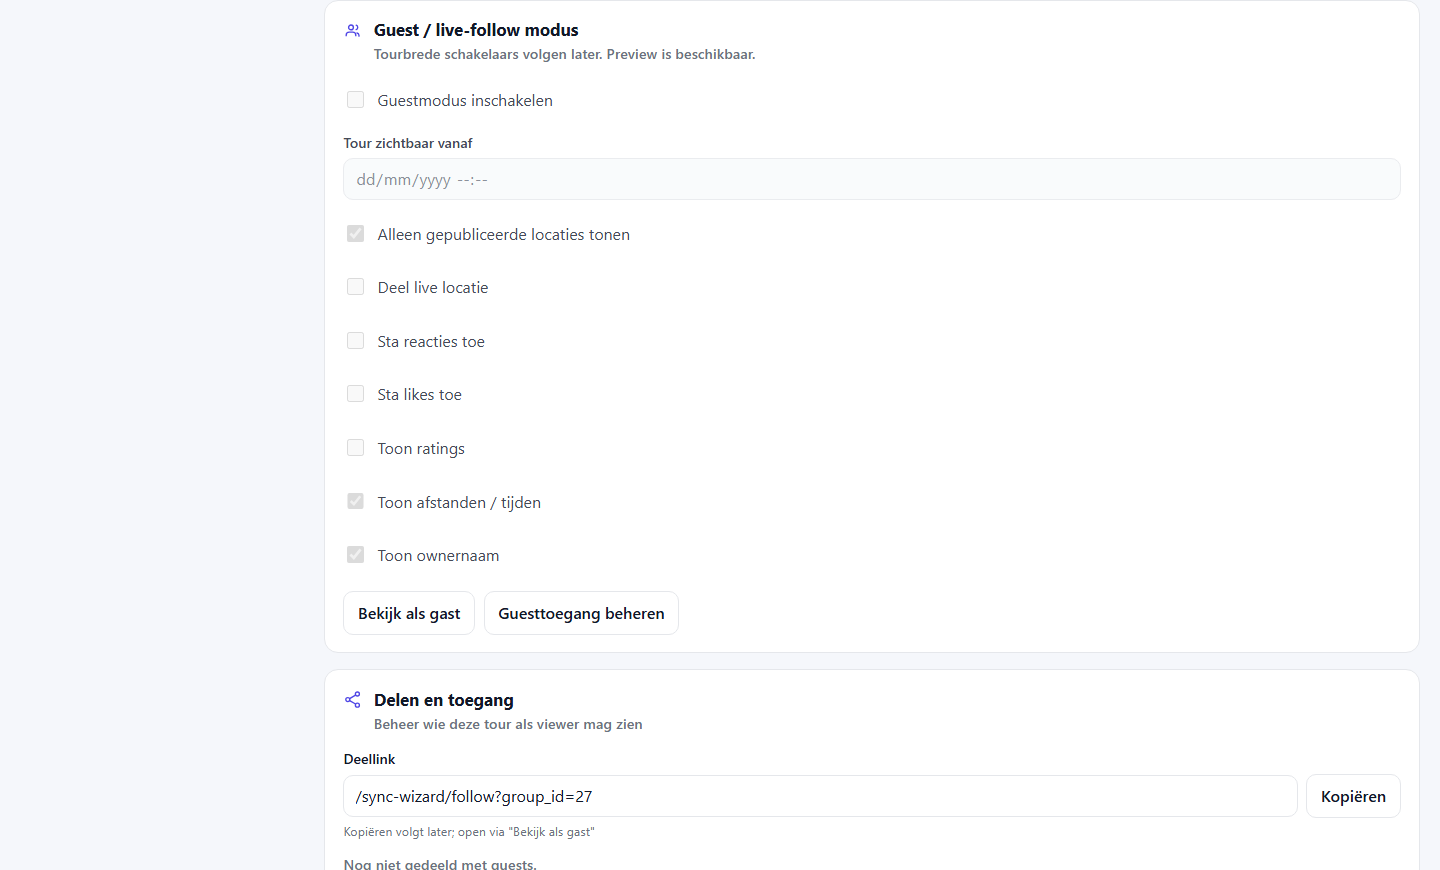
The Sharing and access card also shows a Share link to the mobile follow page of this tour. As long as no guest is linked to the tour, the screen reports Not shared with guests yet.
4.11.6 Core flow: GPX export or import
- use
Export GPXto take a tour out of the app - use
Import GPXto add a GPX file to a tour
4.11.7 Deleting a tour
Delete tour is followed by an extra step. There you choose whether linked route points:
- are only unlinked from the tour
- or are permanently deleted
Read this step carefully before confirming.
4.12 Location management
4.12.1 Purpose of this screen
Location management is used for recognized stay locations and the associated theme estimate.
4.13 Auto recognition
In Auto recognition you manage settings for recognizing stay locations.
This section determines, among other things:
- when a stop still counts as a break
- when something counts as a
visit address - when something counts as an
overnight stay
Only use these settings if you deliberately want to adjust the recognition behavior.
4.14 Recognized locations
In Recognized locations you see the list of recognized stops for the chosen tour.
Here you can, among other things:
- filter by tour
- view the theme estimate per location
- view the confidence of the estimate
- manually adjust theme values
- have AI themes recalculated
4.14.1 Theme estimate and confidence
Per location you see:
- a source label, for example
Default,AI agentor a manual correction Theme estimateConfidence, this is thetheme_confidence
In practice, theme_confidence means:
- higher confidence, more trust in the current theme distribution
- lower confidence, more cautious interpretation of the current distribution
4.14.2 Manually adjusting themes
Per location you can adjust 7 theme fields.
Important:
- the 7 theme values must add up to exactly
100% - if the total is not correct, the change is not saved
Core flow:
- Find the correct location in the list.
- Adjust the 7 theme values.
- Check that the total is
100%. - Save the change.
4.14.3 Calculate AI themes now
With the Calculate AI themes now button, you have TrackSense re-analyze the visible locations.
Condition:
- AI calculation must be active and available
If AI calculation is not active, the app keeps using the default estimate.
4.14.4 Common messages
- a success message confirms that a location update or AI run has been processed
- an error message usually means that input is incorrect, or that the AI account is not active
4.15 Point management
4.15.1 Purpose of this screen
Point management is used for loose and linked route points.
4.16 Filtering route points
In Route points you can filter by:
- tour
- period
- time window
- whether or not to show only unassigned route points
Use these filters before assigning or deleting points.
4.17 New route point
In New route point you manually add a route point.
Main input fields:
- tour, or
No tour - time
- place name
- latitude and longitude
- name
- travel report or note
Core flow:
- Optionally choose a tour.
- Fill in the time.
- Fill in place details or coordinates.
- Optionally add a name and travel report.
- Click
Add route point.
If you do not choose a tour, the point remains unassigned and you can assign it later.
4.18 Route point list
In Route point list you see all points that match the active filters.
Per point you see, among other things:
- sequence number within the route or selection
- title or time
- place name
- source or type
- linked tour, if there is one
4.19 Bulk actions
4.19.1 Assign all
With Assign all you link all points from the current filter set to a chosen target tour.
Core flow:
- First set the correct filters.
- Click
Assign all. - Choose the target tour.
- Confirm with
Assign.
4.19.2 Unassign all
With Unassign all you unlink the current filter set from the selected tour.
Only use this if you are sure the chosen filter set is correct.
4.20 Sorting and pagination
In the point list you can switch between:
Oldest to newestNewest to oldest
With many points, pagination appears with:
PreviousNext
With bulk actions, always check that you are working on the right page and with the right filters.
4.21 Opening or deleting individually
Per route point you can:
- choose
Opento view the detail - choose
Deleteto delete the point
In the detail you can manage photos, videos and the travel report of the route point. Videos may contain multiple files and have an upload limit of 50 MB per file.
Deleting requires confirmation. Only use this for points that can really be removed.
4.22 Common messages
No route points to show for these filters yet.means that your filter set currently yields no results- error messages for bulk actions usually mean that no target tour was chosen, or that the filter set is not correct
5 Travel planner
5.1 Purpose of this screen
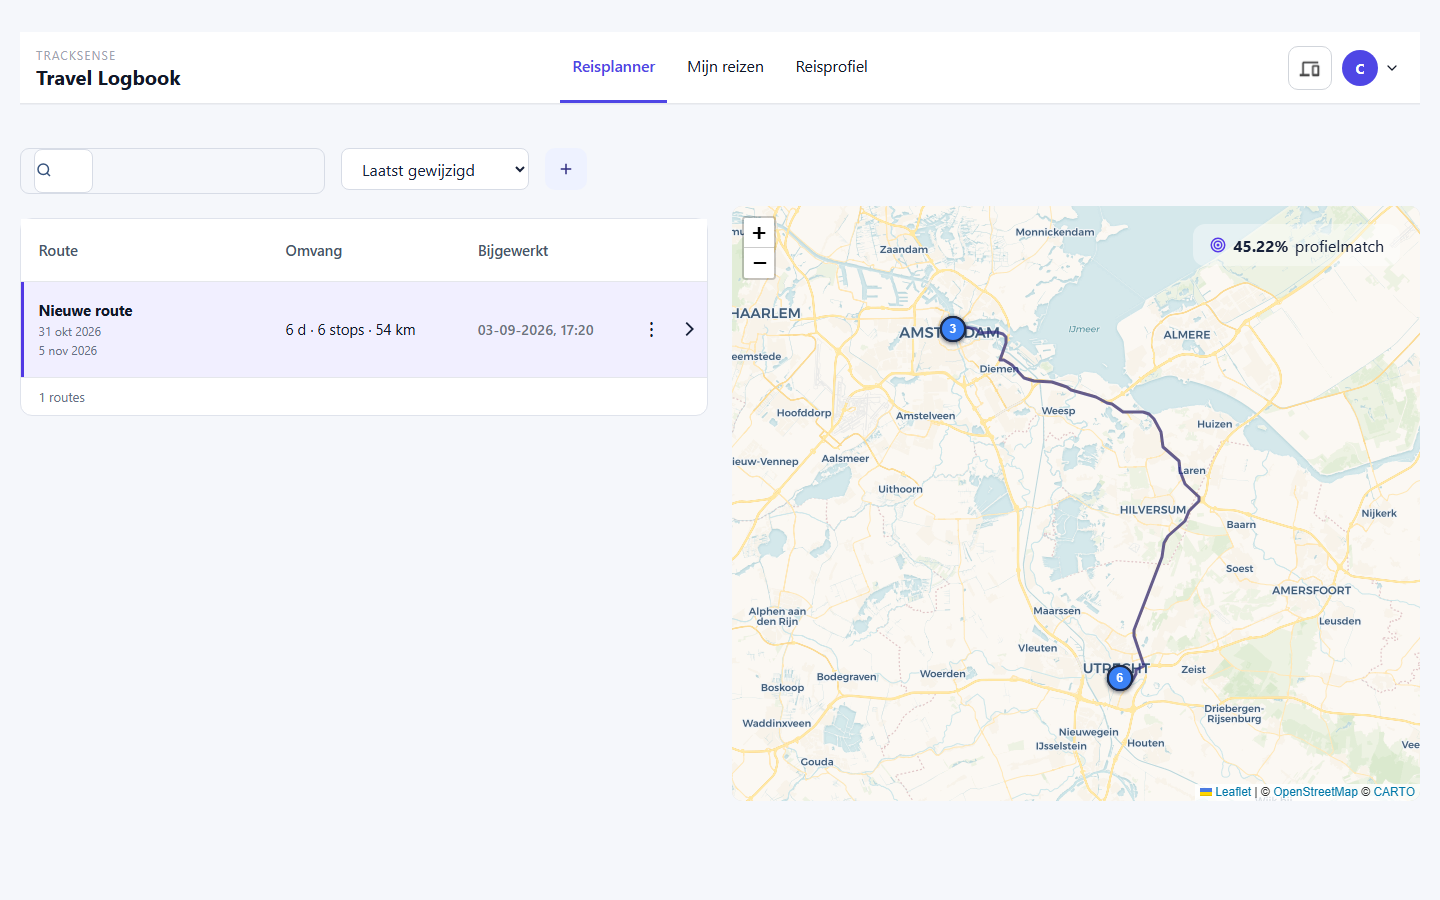
Travel planner (address /reisopbouw) helps you build a route you haven't driven yet: a timeline with stops, destination suggestions by theme, and overnight suggestions per stop. The planner uses country or region, travel time per stop, chosen themes, vehicle context and, if you choose, your travel profile and the expected weather to suggest destinations.
See Quick start for the shortest path from an empty route to a planned trip with invited guests.
5.2 Building a route and stops
- Open
Travel planner. You see a list with your existing routes and, on the right, a map preview of the selected route. - Click
+to create a new, empty route, or open an existing route. - Fill in a
Planned start date; the end date is calculated based on the number of stops. - Click a
+button in the timeline between two stops (or at the start) to openAdd destinations.
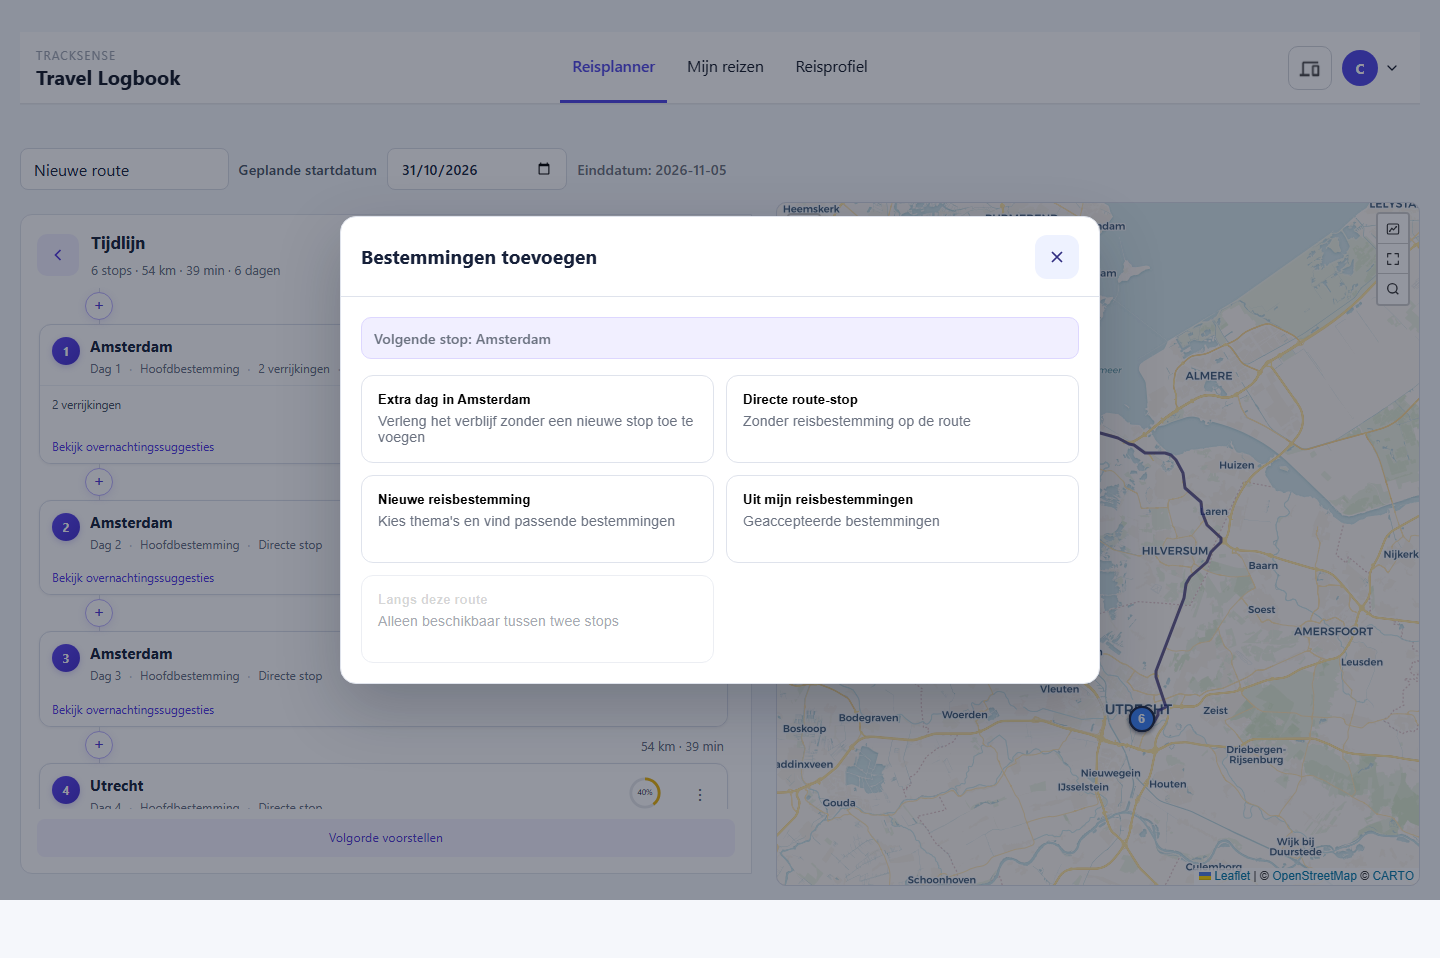
In this window you choose how to add a stop:
Extra day, extend the stay at the previous stop without a new locationDirect route stop, a stop without a trip destination on the route, for example a waypointNew trip concept, have TrackSense suggest suitable destinations by theme (see below)From my trip concepts, choose from destinations you previously acceptedAlong this route, only available when you insert a stop between two existing stops
If you choose New trip concept, you go through a short wizard:
- Choose
Where do you want to search?:Country,RegionorAround a place. - Set the number of days for
Stay. - Choose one or more themes under
What matters most for this destination?: Water, Culture, Nature, Peace and quiet, Adventure, Social, Amenities. - Turn on
Use my Travel profileif the suggestions may align with your travel behavior. - Turn on
Take expected weather into accountto have the order of suggestions weigh in the weather forecast during your stay. - Select one or more suggested destinations and confirm.
5.3 Reviewing and adjusting a route
At each stop in the timeline you see, among other things, the day number, the type of stop (Main destination or Direct stop) and, if your travel profile is used, a profile-match percentage. Use the ⋮ menu at a stop to move, delete or replace it.
Click View overnight suggestions under a stop to see campsites and motorhome pitches nearby, with profile match, extra travel time and available amenities. Click Suggest order at the bottom of the timeline to have the existing stops reordered for a more logical route.
5.5 From planning to live tracking
A route in Travel planner is a plan: TrackSense does not follow it automatically live and guests cannot yet follow it. Once you get on the road and want guests to watch along, you need a tour (see Tours) and a guest link (see Guest access and mobile follow). The shortest path to this is in Quick start.
5.6 Advanced management screens
These sections are not intended for the standard end user, but may be visible for root or administrator accounts:
User management, for users and session settingsSecurity audit, for viewing audit logsDatabase management, for maintenance and recovery actions
Only use these screens if you are responsible for them. For normal, everyday use of TrackSense, Travel planner, My trips, Account, Tours, Access and guests, Location management and Point management are usually sufficient.
6 Sources and licenses
6.1 Purpose of this screen
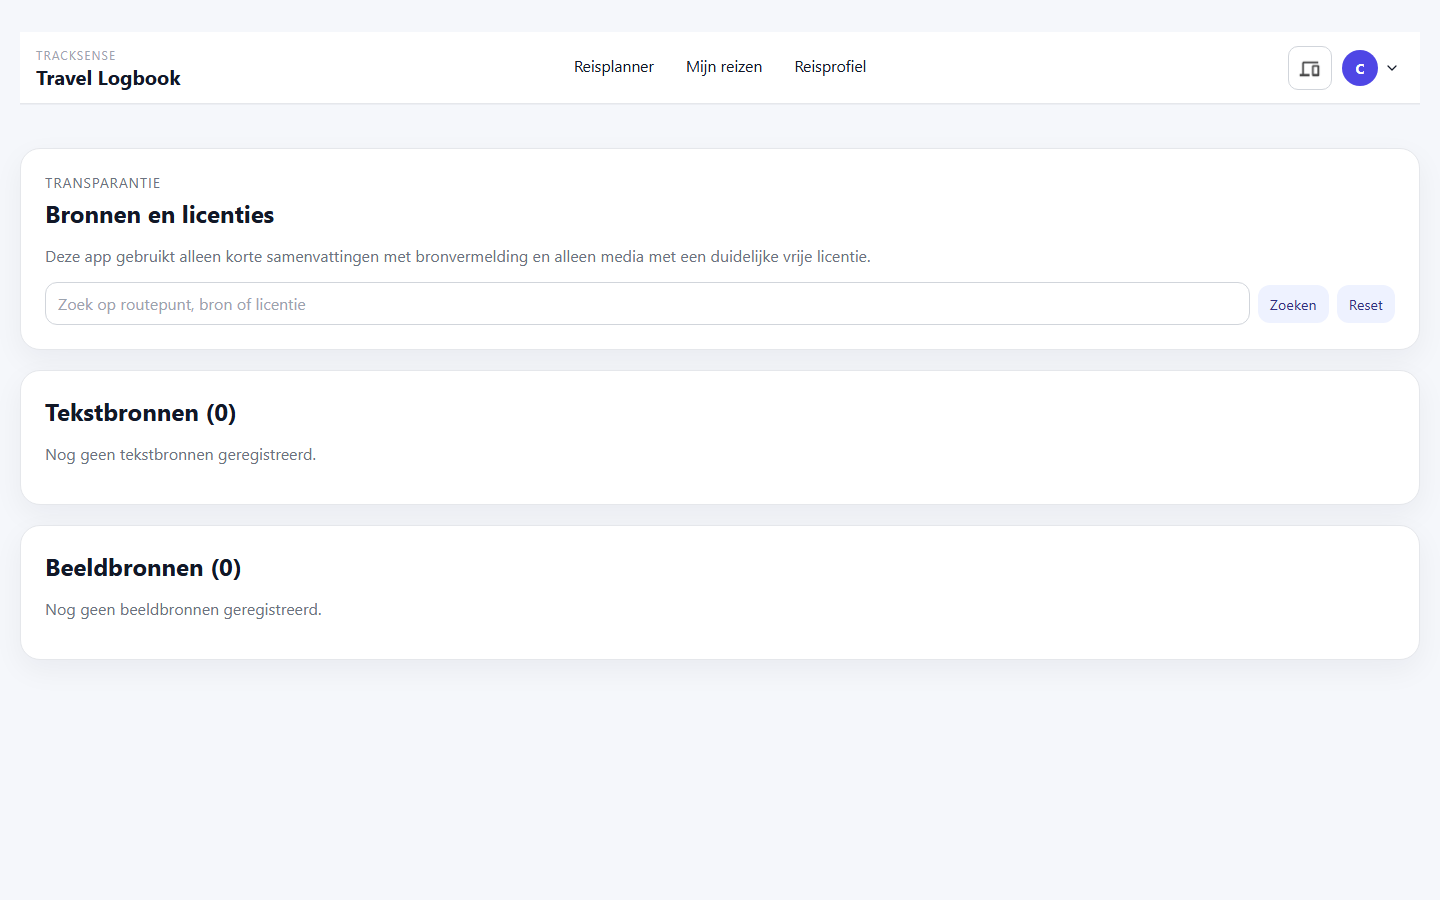
Sources and licenses gives insight into the origin of data and the software components used. This screen helps you understand which sources TrackSense uses and under which conditions components are available.
6.2 What you see here
- data sources used, such as
WebastoandMobile - an overview of software components and their licenses
- version or origin information, where available
6.3 When you use this
Use this screen if you:
- want to check which sources are actively being used
- want transparency about license terms
- need information for internal management or compliance
6.4 Practical user flow
- Open
Sources and licensesvia the top bar. - View the list of sources and components.
- Check the license or origin information per item.
7 Mobile
7.1 Purpose of this screen
Mobile is intended for use on the road, with a focus on live tracking and compact controls. In this flow you work on a smaller screen, with the most important actions directly available.
7.2 Important behavior
- in standalone mobile web-app mode, TrackSense opens directly into the mobile flow
- the mobile flow connects to
follow modefor live route display - in the mobile header you can switch routes when multiple routes are available
- a guest account can only use this mobile follow flow
7.3 Access and conditions
- owner users can start on mobile from
Settings, viaOpen mobile sync wizard - guest users need an active guest account
- an active route must be available to start live tracking
7.4 Practical user flow
- Open TrackSense on your mobile, or go via
SettingstoOpen mobile sync wizard. - Choose the correct source mode,
WebastoorMobile, if that choice is shown. - Start
follow modeto track the live route and travel information.
Installing as an app:
- Android (Chrome):
- Open TrackSense in Chrome.
- Tap the three-dot menu.
- Choose
Add to home screenorInstall app. - Confirm with
Install.
- iOS (Safari):
- Open TrackSense in Safari.
- Tap
Share. - Choose
Add to Home Screen. - Tap
Add.
7.5 Common things to watch for
- if follow does not start, check whether there is an active route
- if guest access does not work, check whether the guest account is active
- if data is missing, first start a sync from
Settings → Synchronization